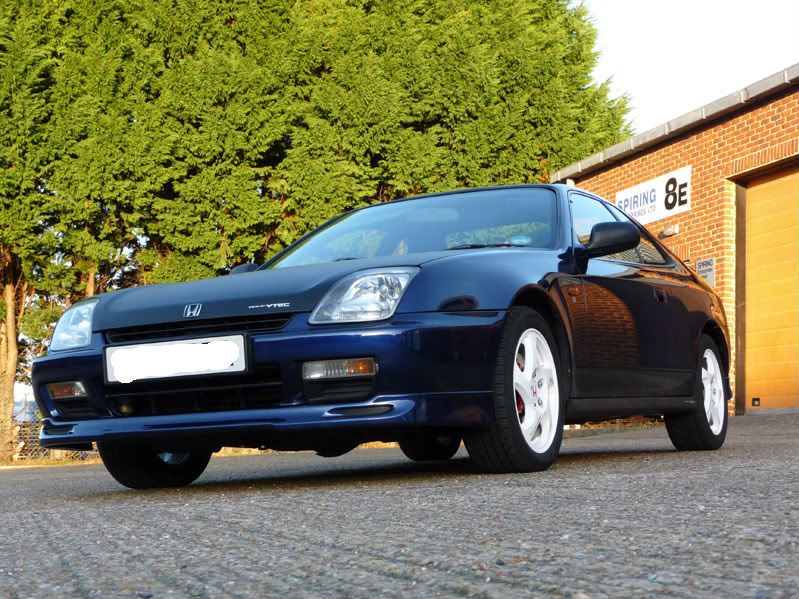
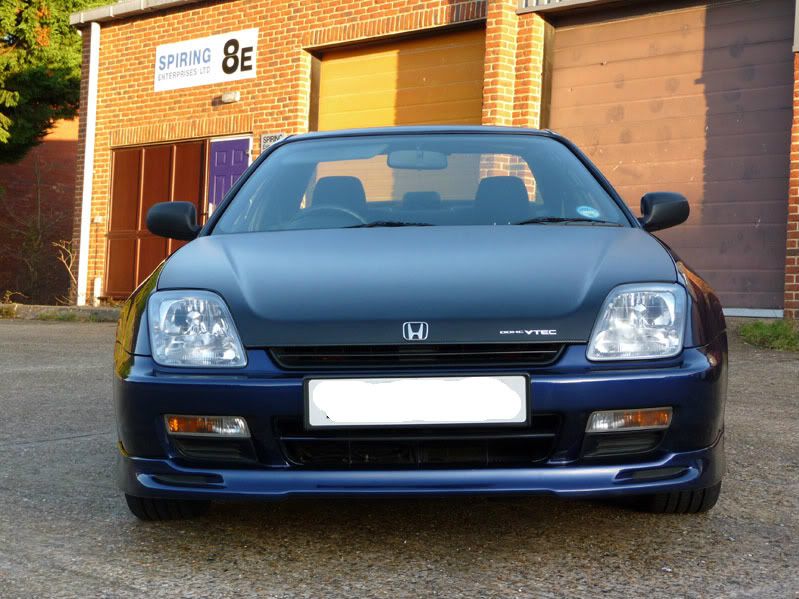
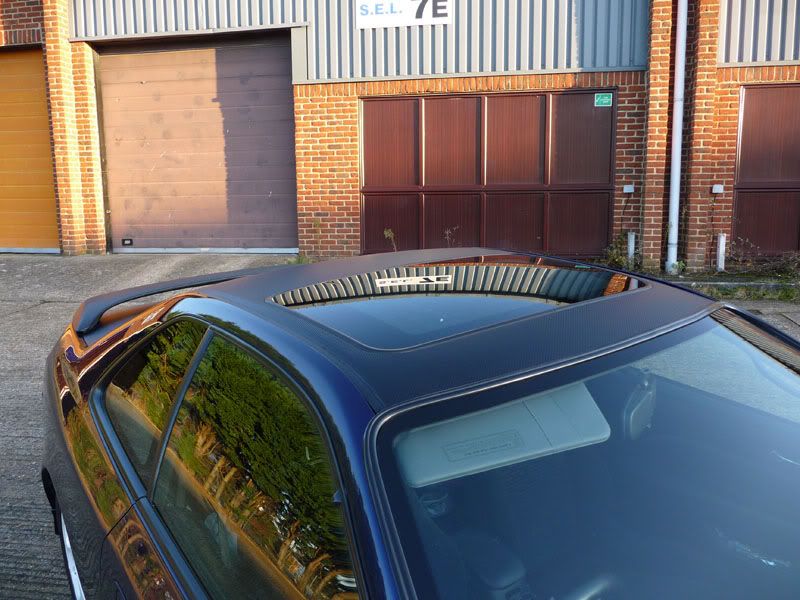
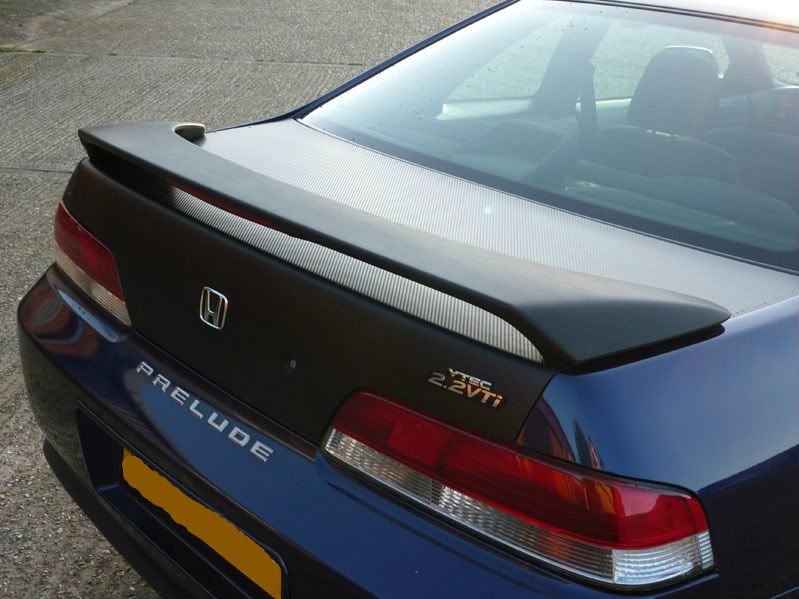
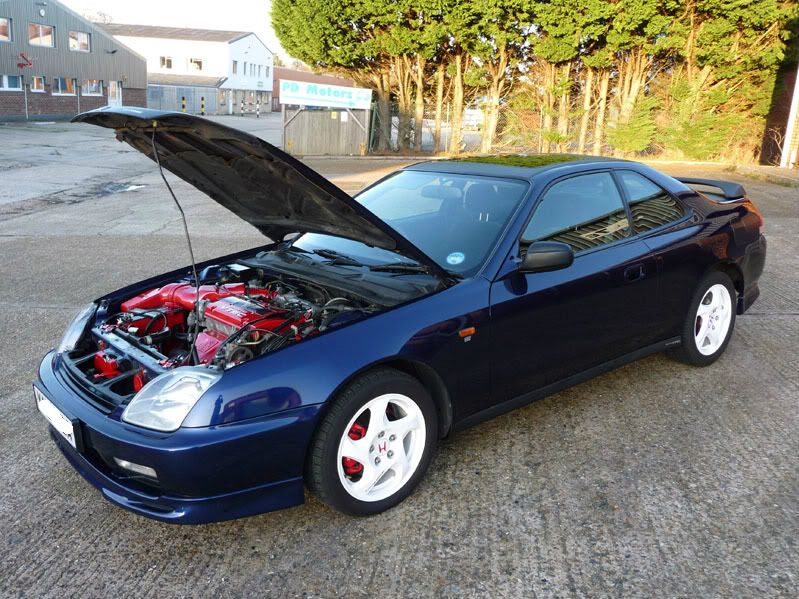
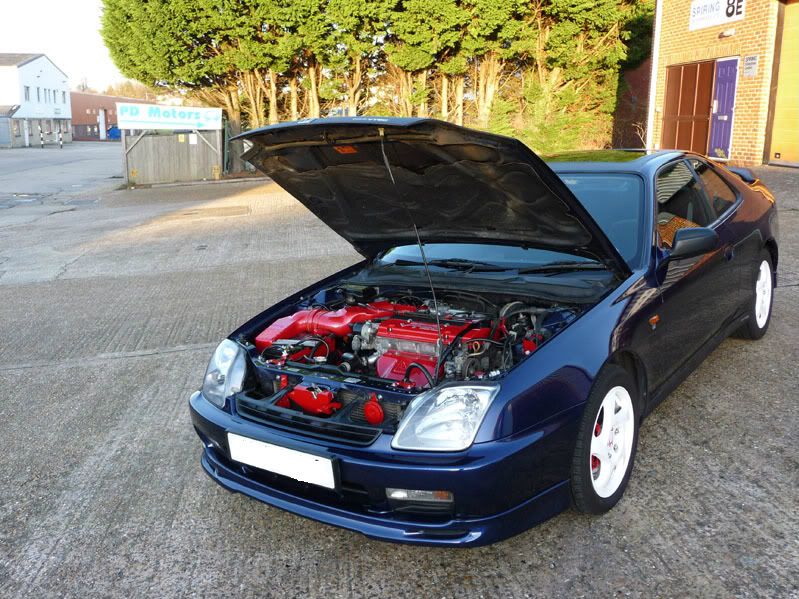
Congratulations to vtecmec for winning May/June's Lude Of The Month, with his DIY Turbo BB1 build.

>>> Click Here For Profile <<<

Image

My 2.2 vti 5th Gen

Tell us all about your Lude, you know you want to ...
Post Reply
User avatar
vti2003
LotM Winner
Posts: 197
Joined: Fri Sep 16, 2011 2:20 pm
My Generation: 5G
Location: West Sussex

My 2.2 vti 5th Gen

Post by vti2003 » Tue Apr 03, 2012 6:41 pm

I have moved this profile from PUK and will update it here now as this place seems better and busier!!


I thought it was about time I got some pictures up.

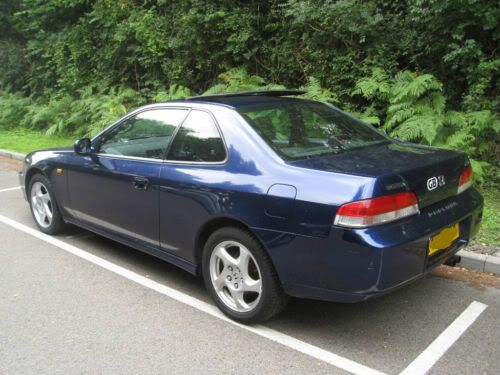
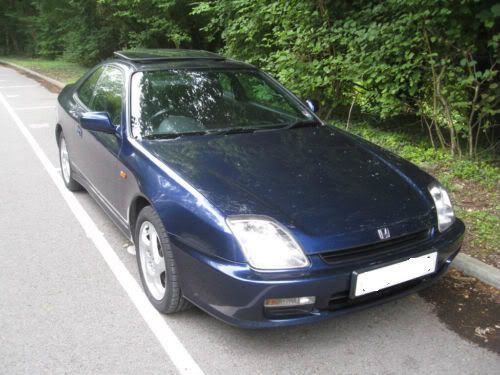
I have had the car for about 3 months now. I have wanted a Prelude for a long time but circumstance kept spoiling my plans!

I bought this and it is going to be a long term keeper. The plan is to slowly work through the whole car and get it sorted. For the first time I have a second car that I can use so the major urgency to keep this on the road and running all the time has gone so I should have some time to sort it.

Started with the basics and serviced everything :

Removed throttle body and cleaned out and cleaned up.
Cleaned out IACV
Cleaned out FITV
Cleaned EGR Valve, removed EGR Plugs and cleaned paths out.
Changed fuel filter
Removed stripped and cleaned fuel rail and associated piping
Had injectors ultrasound cleaned and flow tested.
New plugs, leads, coil, dizzy cap and rotor arm.
Sorted Valve Clearances
Cleaned out intake piping and fitted new Air Filter.

Whole front came off, bonnet, wings, bumper and rear boot lid. All stripped, primed and resprayed with 2 pack. You can't see it in the pics but the amount of stone chips on the car when I bought it was stupid. The plan is to redo the doors, rear bumper and rear wings later on when the weather is better.

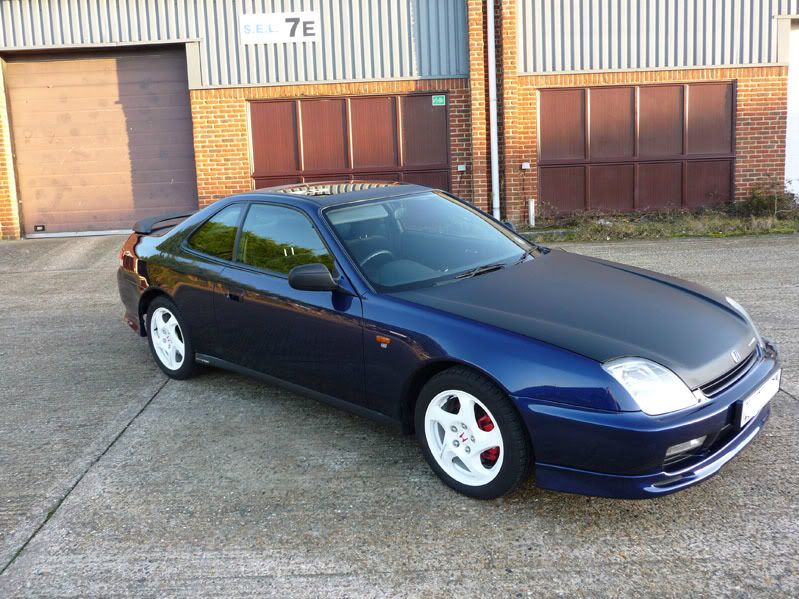
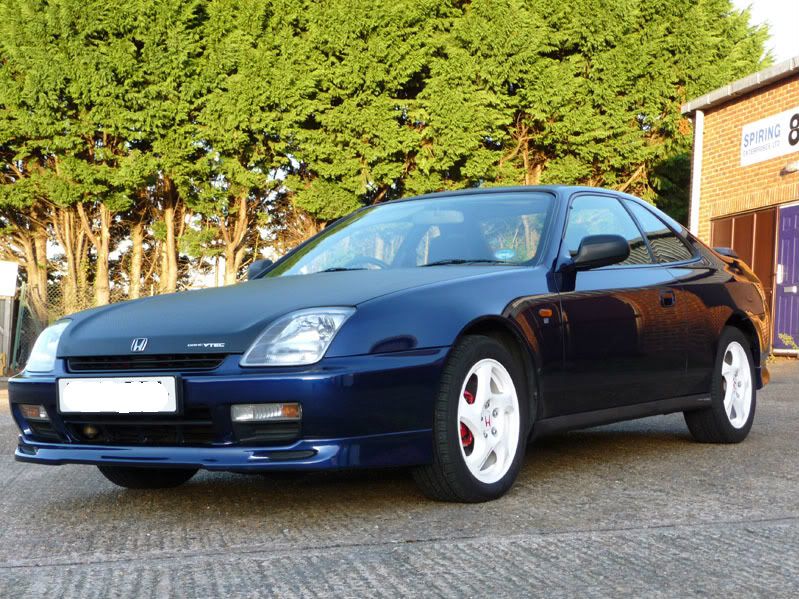
I then got the Motegi Lips - courtesy of Ratty. Stripped painted and fitted those.

I then got tired of looking at the very corroded and kerbed wheels. Can't afford new wheels at the moment so they went down to get the tyres off and after much swearing, paint stripper, wire brushes etc they were painted up in epoxy 3 pack white. I am happy with them for now.

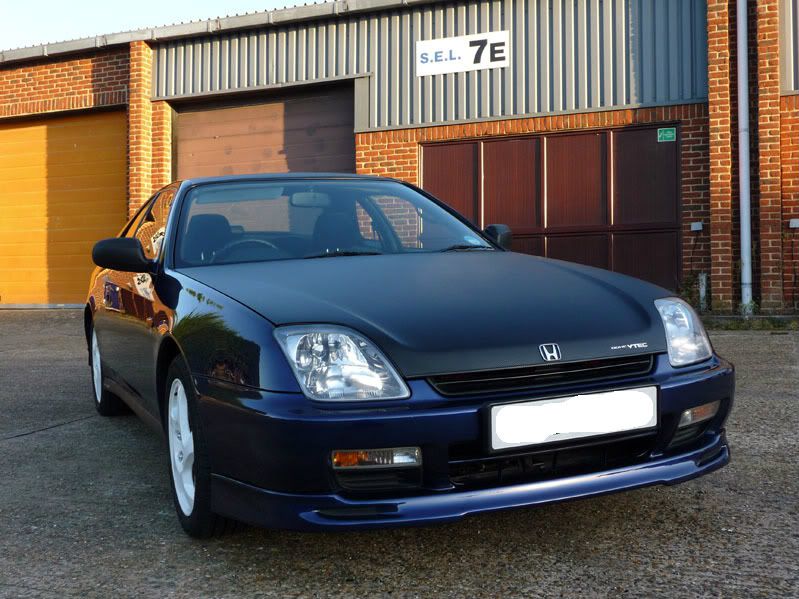
I then acquired a pretty large offcut of 3m Di-Noc carbon wrap. So the bonnet, Roof, Boot lid Rear Spoiler and Side skirts and wing mirrors were all wrapped. Don't ever let anyone tell you it is easy. Took me pretty much a day for each panel to get it right.

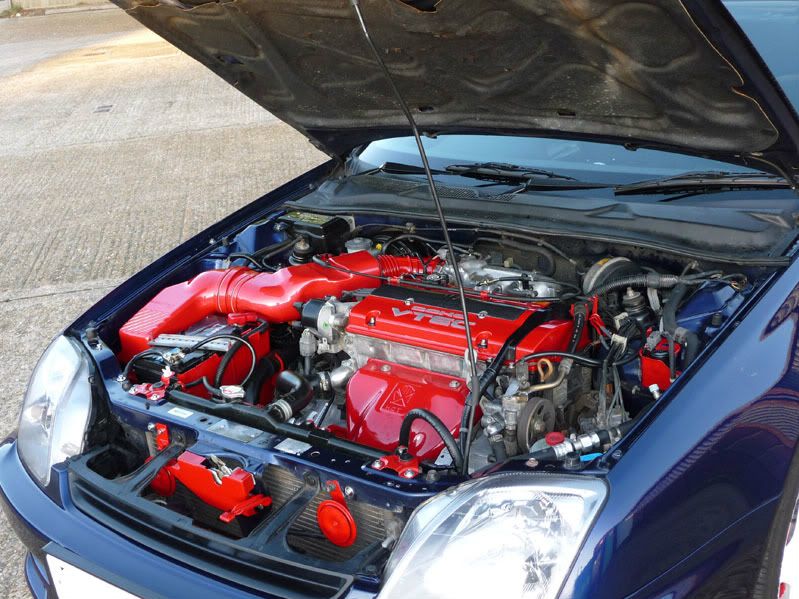
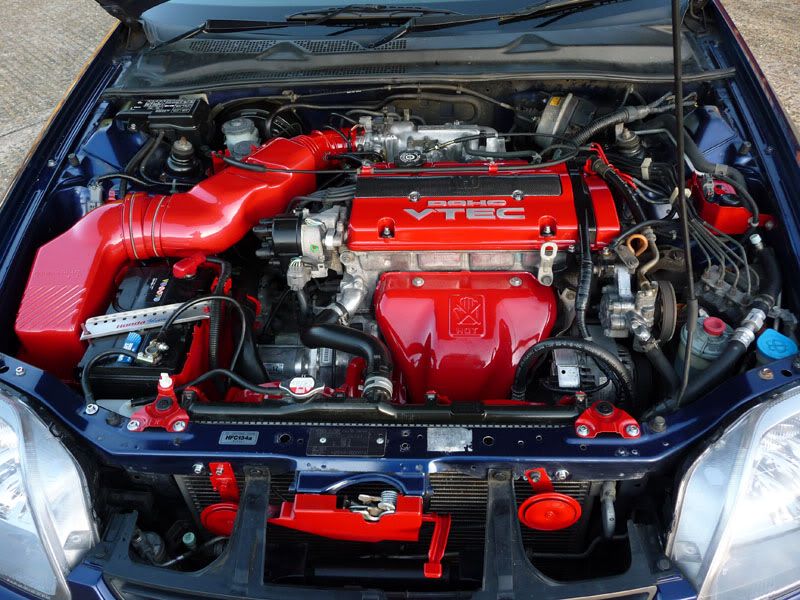
Then I got bored over the Christmas break so I thought it was time to sort of the disgrace of an engine bay. Removed loads of stuff. Cleaned the bay out. Treated any rust I found. Lots of wax on the paintwork. Then sandblasted all the rusty bits (Brackets etc) and gave them a good coat of primer and epoxy paint. All the horrible rusty M6 bolts removed and replaced with M6 Cap Screws and Washers or Bolts and Washers all in stainless with lots of thread lube on them.

So that is where I am now. Next project is get the suspension off and clean/paint and polybush it all. I am waiting for the spring for that one though.

Let me know what you think. I know Carbon is not everyone's cup of tea but I like the finished look :)

I will keep this updated as I go along


When I bought it :
Image

Image

The Car Now :

Image

Image

Image

Image

Image

Image

Image

Image

Image

Image

Image

Image

Image
Last edited by vti2003 on Sat Feb 02, 2013 1:52 pm, edited 4 times in total.

User avatar
Donald
Supporter 2015
Posts: 9894
Joined: Sun Jun 12, 2011 10:17 pm
My Generation: 0G
Location: Earth 3.0
Been thanked: 6 times

Post by Donald » Tue Apr 03, 2012 7:02 pm

Looks very clean, lots of red :P your rear wheels are the wrong way around as well I think? Unless that was intentional then points for being different 8-) :lol:

User avatar
vti2003
LotM Winner
Posts: 197
Joined: Fri Sep 16, 2011 2:20 pm
My Generation: 5G
Location: West Sussex

Re: My 2.2 vti 5th Gen *Updated 03 April *

Post by vti2003 » Tue Apr 03, 2012 7:40 pm

March/April 2012

Much work has been going on for the last few weeks.

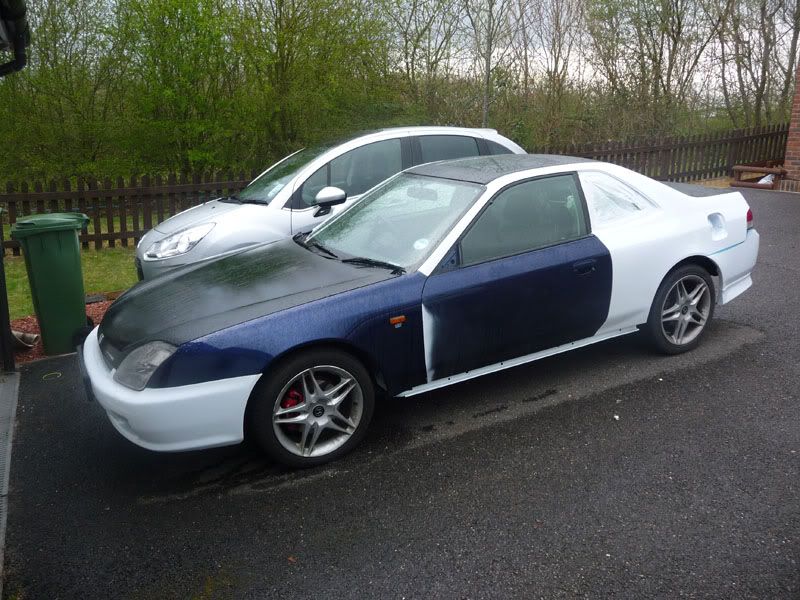
I wanted to sort out the bodywork/paintwork. It looks fine in the pictures with a coat of wax on it but up close I have never seen so many tiny stonechips - the whole side of the car is covered, both sides all the way up to the roof rails.

The only thing I can think is that is was parked on a road over winter and was attacked nightly by gritter lorries!

There was also a lot of fairly deep scratches along the sides, through the basecoat but not the primer, as well as a couple of tiny bits of rust starting.

Being a metallic/pearl or whatever it is I knew there was no chance of a decent match so I was looking at a respray. Next decision was colour. In the end I decided on white. I intend to keep this car for a while so a major part of the decision was the ability to repair the paintwork in future without major hassle. That and the fact I have always had a soft spot for white cars! I went for an acrylic 2 pack paint as I have breathing gear available.

So trawling through Gumtree/Ebay/Friday-ad etc I eventually found someone selling 2 wings and 2 doors complete. Off we went and just about squeezed the whole lot into the wife's C3 :D

Next step was to line the garage out with plastic sheeting and setup a decent dust free spray area and get a prep area setup on the back deck.

In the meanwhile a friend of mine has had his prelude go to prelude heaven kindly swapped his motegi wheels before it went, so I am back to wheels that need a refurb. Job for the summer.

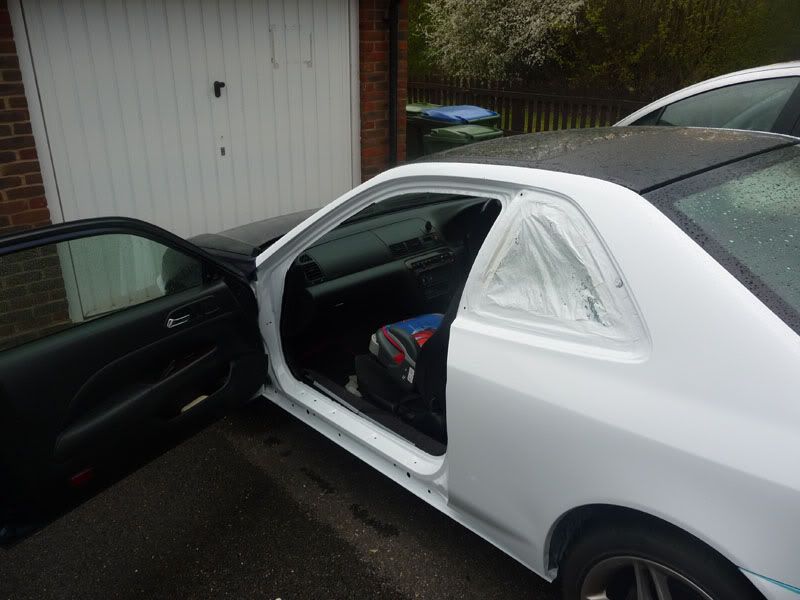
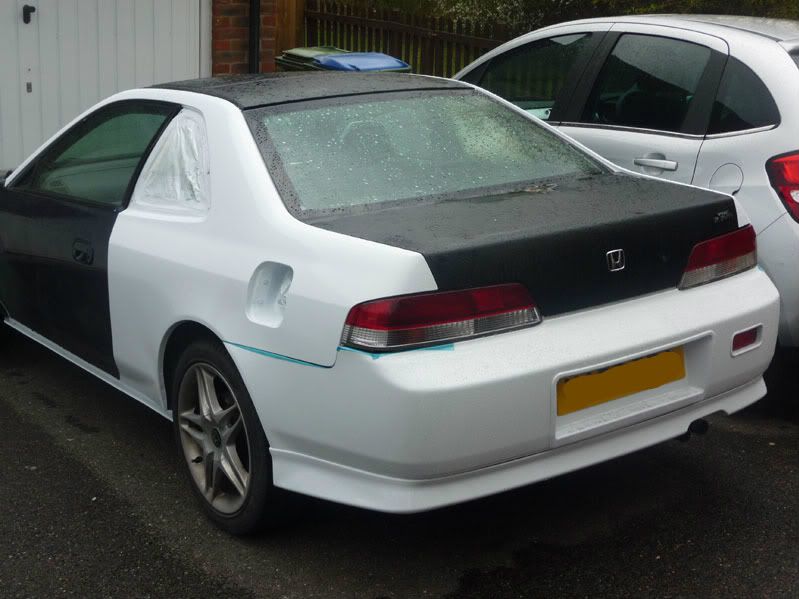
Anyway, much work, backache, swearing, tea and ciggys later we have the below result. Just need to spend the next 6 days putting it all back together.

The rear quarters are going to need a cut back with Trizac and compound but I went on the theory that I didn't want to have to strip it out like that again so I put it on extra thick with the idea of perfecting it later. No runs but some peel in it.

The bootlid still needs spraying but I have run out of paint and I think I really should buy some food this month rather than spend it all on the car 8-) So that will get done later.

I will post some more pics this week as it goes back together this week

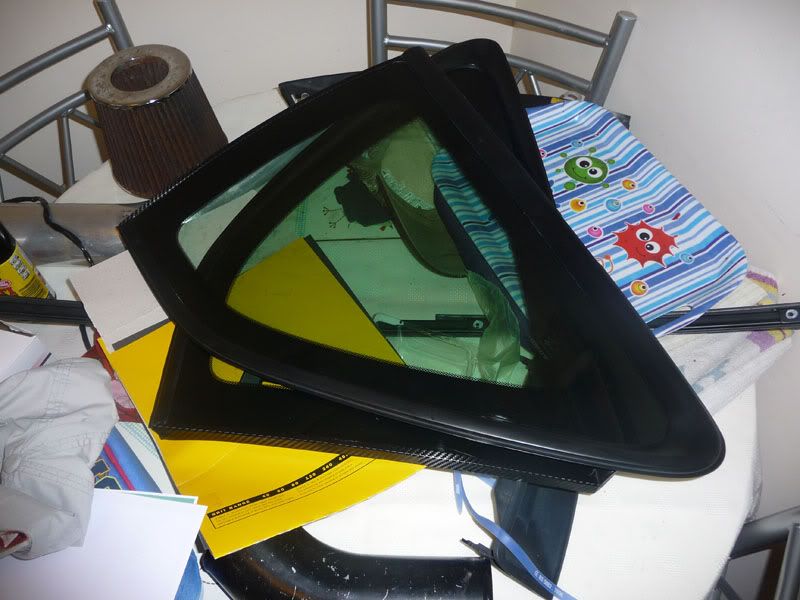
Oh - if you ever wake up one morning and think "I might take my rear windows out today" save yourself some trouble. Give yourself a good hard slap or two and go back to bed. . It was the worst job I have done on either a car or airplane for as long as I can remember.

Anyway pics as of today :

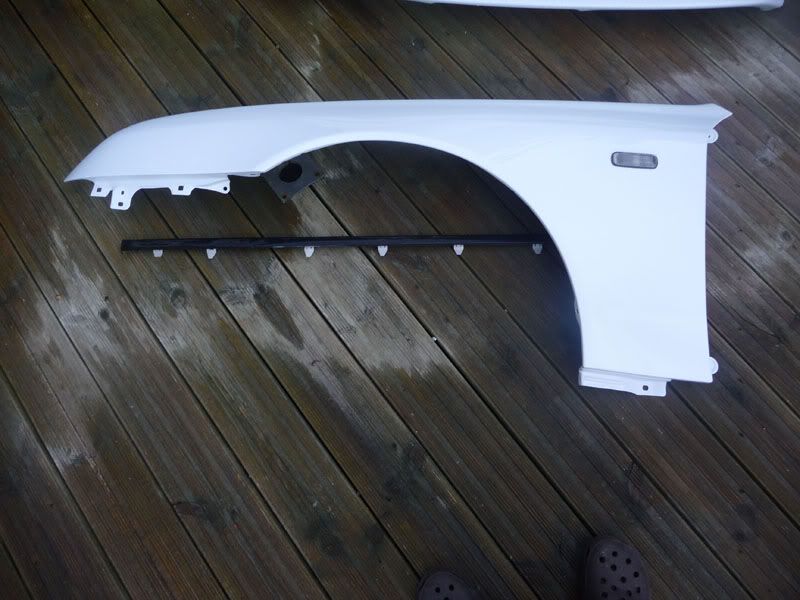
Wing
Image

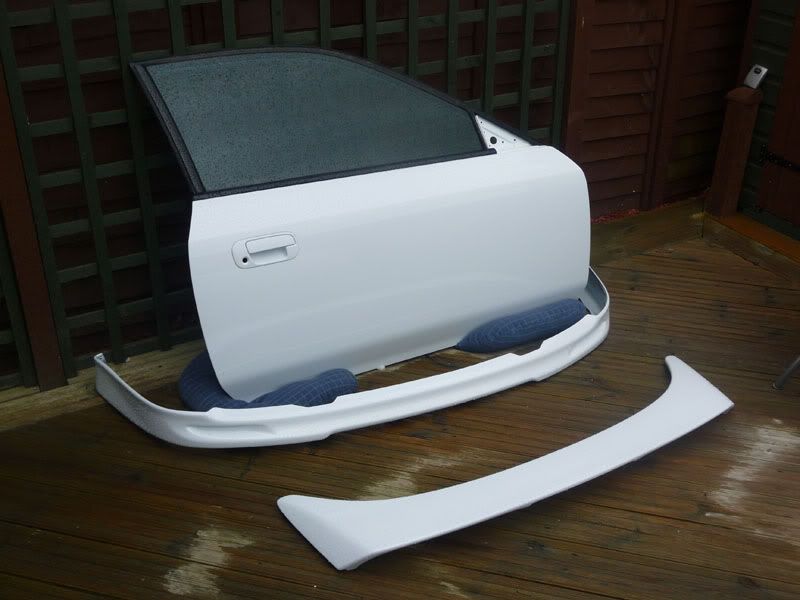
Drivers Door, Skirt and Spoiler
Image

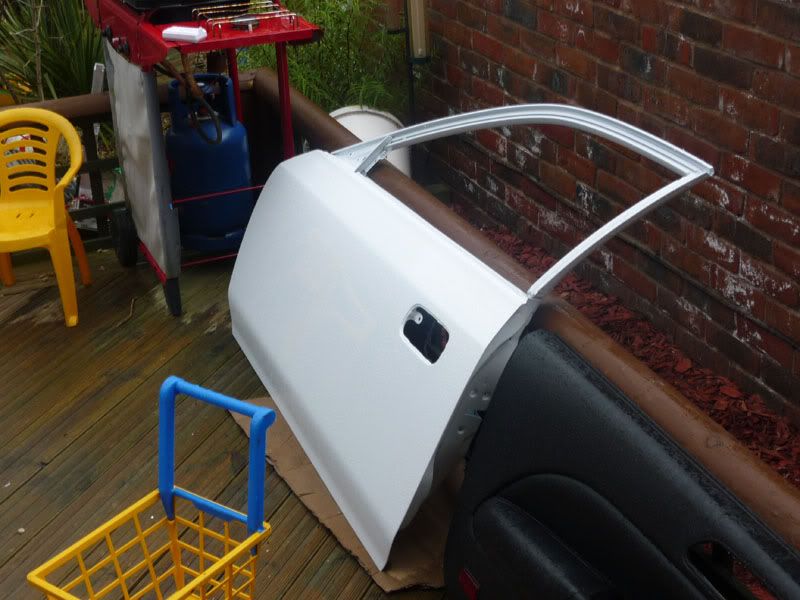
Pax Door
Image

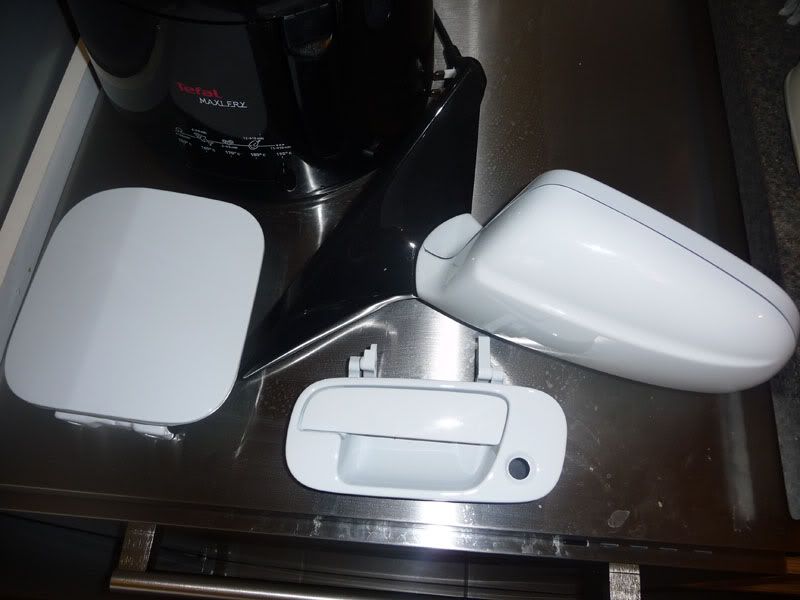
Wing Mirror/ Fuel Cap and Door Handle - sitting on a very stylish stainless steel diishwasher :)
Image

Rear Quarter Windows - Cleaned and heat polished rubber trim
Image

The Car
Image

Image

Image

Typically after weeks and weeks without rain it has started to rain now just as I need to get the interior back in and windows glued in. I must just be lucky :D

User avatar
mercutio
LotM Winner
Posts: 14958
Joined: Sun Aug 08, 2010 8:45 pm
My Generation: 5G
Location: Sunny Manchester
Has thanked: 1 time
Been thanked: 3 times
Contact:

Post by mercutio » Tue Apr 03, 2012 9:38 pm

great work matey looks 8-)
bristol_bb4 wrote:ahhh a 5th gen, i love 5th gens :D :lol:
Dino wrote:I loves the 5th gen really.... just dont quote me on it... ;)
4thgenphil wrote:Mines 4 1/4 unches mate, sorry

http://www.ludegeneration.co.uk/profile ... -t618.html

User avatar
vti2003
LotM Winner
Posts: 197
Joined: Fri Sep 16, 2011 2:20 pm
My Generation: 5G
Location: West Sussex

Re: My 2.2 vti 5th Gen *Updated (Respray)*

Post by vti2003 » Tue Apr 03, 2012 9:41 pm

Thanks - Loads of hard work but it will be worth it when it all gets bolted back together and it matches the picture I have been walking around with inside my head :D

User avatar
bristol_bb4
LotM Winner
Posts: 3369
Joined: Mon Oct 10, 2011 2:19 pm
My Generation: 4G

Post by bristol_bb4 » Tue Apr 03, 2012 9:45 pm

that is going to look F*CKING epic! i dont really like 5th's but i can just tell this one is going to be one of the greats 8-)
Image

User avatar
toadster
Posts: 1906
Joined: Thu Feb 16, 2012 5:21 pm
My Generation: 5G
Location: Norfolk
Has thanked: 62 times
Been thanked: 168 times

Re: My 2.2 vti 5th Gen *Updated (Respray)*

Post by toadster » Tue Apr 03, 2012 11:09 pm

LO :D

Looks like it's gonna be really 8-)

Can't wait to see the finished result :mrgreen:

Cheers for posting the pics ;)

Toadster
Image

User avatar
RattyMcClelland
Moderator
Posts: 9204
Joined: Wed Aug 04, 2010 10:02 pm
My Generation: 5G
PSN GamerTag: RattyMcClelland
Location: Leicestershire
Been thanked: 193 times

Post by RattyMcClelland » Tue Apr 03, 2012 11:52 pm

vti2003 wrote:The rear quarters are going to need a cut back with Trizac and compound but I went on the theory that I didn't want to have to strip it out like that again so I put it on extra thick with the idea of perfecting it later. No runs but some peel in it.
Trizact stuff is excellent. I use the hookit p1000 pads and the trizact paste compound. Love em.
Image

User avatar
Merlin
Moderator
Posts: 12338
Joined: Fri Aug 06, 2010 9:04 am
My Generation: 5G
PSN GamerTag: Merlinbadman
Location: Edinburgh
Has thanked: 56 times
Been thanked: 230 times

Post by Merlin » Wed Apr 04, 2012 8:59 am

Should look good once its all done :D
Image
BA8......... BB4......... BB8.........The JDM Muscle Bus

macky_6
Posts: 1654
Joined: Fri Jan 27, 2012 10:25 pm
My Generation: 5G
Location: Glasgow

Post by macky_6 » Wed Apr 04, 2012 3:36 pm

That's a massive job you have undertaken there :o

Thought i would comment on the wee "DOHC VTEC" badge you have on the front of the bonnet, that's a nice touch 8-)
Image

Post Reply

Return to “Lude Profiles”