Congratulations to vtecmec for winning May/June's Lude Of The Month, with his DIY Turbo BB1 build.

>>> Click Here For Profile <<<

Image

Shiny's Accord Type R....

Got a car that isn't a Lude? There's no condemnation here. Tell us about it!
User avatar
Shiny
Posts: 1972
Joined: Sun Aug 08, 2010 4:15 pm
My Generation: 0G
Location: Sunny Swindon
Has thanked: 2 times
Been thanked: 11 times

Re: Shiny's Accord Type R....

Post by Shiny » Sat Feb 18, 2012 7:59 pm

Bought a Solid Fabrications full system from a pre-facelift - just hoping it will all fit OK on a facelift.

Image


I wanted to clean the car today, but it hammered down with rain, so i thought i'd have a quick go at polishing up the manifold before i get round to fitting it.

Forgot to take any before pics, but it has come up quite well. Tried Autosol on 000 gauge wire wool, but it wasn't doing much. So i tried the DAS-6 with some pads that were just about ready for the bin, again with Autosol -

Image

Image

Image


Here it is against the 4-2-1 pipe, you can see the difference
Image


And the back of the manifold, which is how the front started

Image

Image


Dirty pads!

Image

Image
Image

User avatar
Shiny
Posts: 1972
Joined: Sun Aug 08, 2010 4:15 pm
My Generation: 0G
Location: Sunny Swindon
Has thanked: 2 times
Been thanked: 11 times

Re: Shiny's Accord Type R....

Post by Shiny » Sat Feb 18, 2012 8:00 pm

Time to start ticking another job off my list, polishing up the headlights.

Lots of pictures and a bit of a “how to”, or rather how I did it with the products I had to hand.

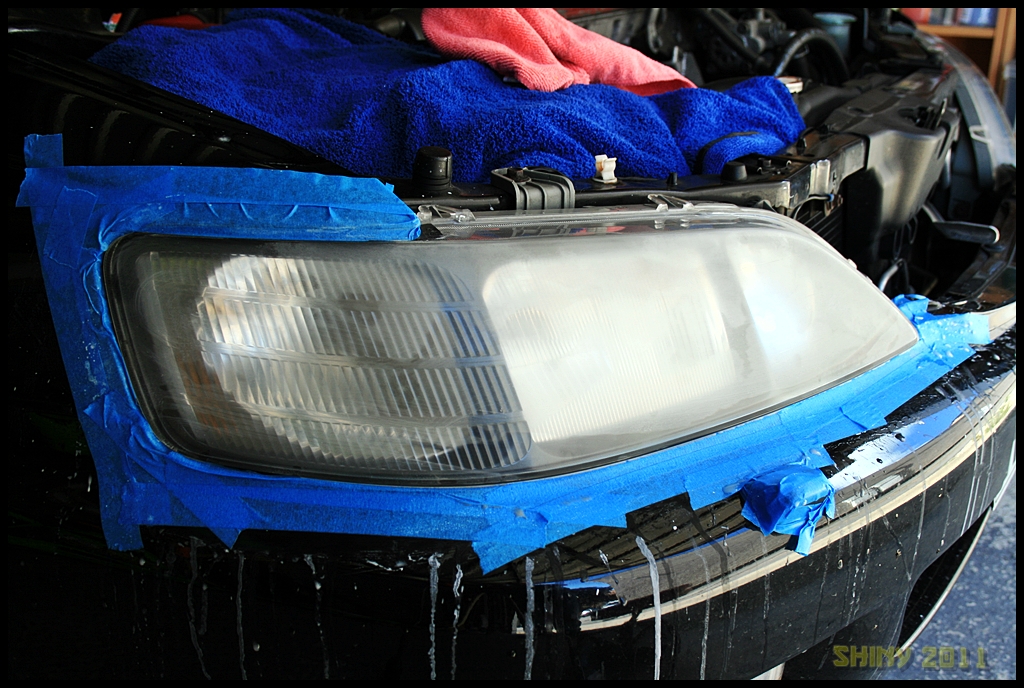
First off how the driver’s side headlight looks, its rough to the touch, dull and you can see what almost looks like overspray on the top, its just the way they go after a while.

Image

Image


First I cleaned the area (I used Optimum No Rinse) and dried off with a microfibre cloth. The reason for this is that you don’t really want to be sanding etc with dirt and grit as it could cause some deep scratches

Image

Image


The P1500 & P2500 in some water having a little soak

Image


Next off I masked off the area with blue tape to protect the surrounding paint work

Image


Then, after wetting the headlights, got to work with the P1500

Image


I then dried this off to see how it was doing

Image


Next up, some P2500 to refine the sanding marks and make polishing easier, again with plenty of water

Image


All dried off, this is when the panic sets in as your lights look a mess

Image


So onto the DA polisher with a spot pad. I only have a polishing and finishing spot pad, I really needed a “cutting” pad, but had to make do.

Image


Prime your spot pad and spread the polish at a slow speed. I started with Menzerna cutting polish.

Image


Then whip up the speed and start polishing, slowly moving the polisher and applying some pressure to get the polish to break down and work

Image
Image

User avatar
Shiny
Posts: 1972
Joined: Sun Aug 08, 2010 4:15 pm
My Generation: 0G
Location: Sunny Swindon
Has thanked: 2 times
Been thanked: 11 times

Re: Shiny's Accord Type R....

Post by Shiny » Sat Feb 18, 2012 8:00 pm

After going over it a few times, it was looking much better, but I wasn’t that happy as the finish was still quite dull in places

Image


So back out with the wet & dry..

Image


After sanding again

Image


The Menzerna didn’t seem to be doing that much of a job, mainly down to the pad not being aggressive enough, so I gave some GTechniq P1 a go, this is a nanoscopic polish that is as abrasive as the pad you use, the idea being you can use it from cutting to refining just by changing pads. This is the light after polishing with the P1 on the polishing pad.

Image


Time for some refining, so I used P1 on a finishing pad

Image

Again spread on the light, used a bit more than normal polish as this stuff works differently apparently

Image


All refined

Image


Took off the tape, cleaned up with some more ONR and then applied some sealant to the headlight and the area I had cleaned

Image


Dried off and this is the finished headlight. Being a fussy git, I’m not 100% happy, but it is a vast improvement. I may give it another sanding, but I’m kind of unsure if the minor defects that are left are “on” the plastic or “in” the plastic, obviously if they are in the plastic, no amount of sanding will put it right.

Image

Image

Image


The right side of the light looks bad in this, but it is actually the reflection of a pebble dashed house at the end of my garage!

Image


Still got the passenger side to do, but that will have to be another day.

Image
Image

User avatar
Shiny
Posts: 1972
Joined: Sun Aug 08, 2010 4:15 pm
My Generation: 0G
Location: Sunny Swindon
Has thanked: 2 times
Been thanked: 11 times

Re: Shiny's Accord Type R....

Post by Shiny » Sat Feb 18, 2012 8:01 pm

A bit more polishing...

Tidied up the exhaust tips today, they started out like this (phone pics, so 'scuse the quality)-

Image


First off i scrubbed with some fine wire wool (i think it was 000 gauge, i have lost label) and some Autosol. Lots of elbow grease needed but it all came off and i'm pleased the metal was all good underneath.

Image


Next, out come the big guns, DAS-6 polisher, cutting pad and some more Autosol -

Image


I also went over the back boxes...

Image


Buffed up with a clean microfibre cloth and i was left with this...

Image


And the other side...

Image


Can't wait to get it on the car now, just hope it will fit after all this effort (i know have some s/steel to make up some new hangers so it will sit a bit lower due to mine being a facelift).
Image

User avatar
Shiny
Posts: 1972
Joined: Sun Aug 08, 2010 4:15 pm
My Generation: 0G
Location: Sunny Swindon
Has thanked: 2 times
Been thanked: 11 times

Re: Shiny's Accord Type R....

Post by Shiny » Sat Feb 18, 2012 8:01 pm

The manifold was a nightmare getting it in, i think the main problem was the aircon being in the way, but with some careful loosening of bolts, jacking of the engine and a minor adjustment tool (fooking big hammer), he finally managed to get the bottom of the manifold past the sump and into position.

Adjusting the hangers was not as bad as i thought, it was a simple case of heating up the rear hangers with the oxy-acet and bending them up higher to compensate for the lower facelift bumper. A slight it of bumper trimming was needed underneath (where it cant be seen) to avoid rubbing and they doubled up the very rear hanger for extra strength, leaving off the hanger behind the back boxes. It fits a treat.

Sounds awesome, quiet on tickover, but a real deep grunt when you put your foot down. I don't think the missus will like it when i give her a lift to work tomorrow, but hey, it's not her car!

I've just reset the ECU tonight so all should be good in the morning. Didn't get time to look at the throttle cable (the manifold took ages to get into place) so that will be another day. With the exhaust and two new O2 sensors, hopefully the car will feel like new, especially if they can come up with something for the throttle cable.

Pics (sorry on the phone again..) -

Image

Image

Image

Image

Image

Image

Image


And a quick sound clip of a blip of the throttle, again on the phone so not the best quality -

Image
Image

User avatar
Shiny
Posts: 1972
Joined: Sun Aug 08, 2010 4:15 pm
My Generation: 0G
Location: Sunny Swindon
Has thanked: 2 times
Been thanked: 11 times

Re: Shiny's Accord Type R....

Post by Shiny » Sat Feb 18, 2012 8:02 pm

Managed to find a bit of time to start polishing again. The car wasn't very dirty at all so i didn't wash it, instead i just wiped down the panel i was going to work on with ONR and then clayed it. Either my half arsed cleaning attempt or the clay made the marring appear worse, live and learn though, i'll be a bit more careful next time. First time using BH clay too and i probably didn't use enough water which didn't help.

So, the rear o/s quarter was what i worked on this afternoon for a short while, in between running my lad to Toys R Us (needs a water pistol for a water fight at school tomorrow, the same school that has cancelled sports day twice as the ground might be a bit slippery :dunno: ) and picking the missus up from work.

Anyway, under the lights, the scratches and swirls show themselves...

Image

Image

Using my DAS6 with Gtechniq P1 on a Megs polishing pad, i did the half the roof support first to see how things went. Came up very well, not quite the level of correction i wanted, but i think i need a cutting pad to get any better results (my cutting pad has had it's day now, i must get a new one!). Finished off with P1 on a finishing pad -

Image

Image


Next onto the rear panel which needs some work

Image


Same method, some 50/50s -

Image

Image

Image


Finished the rest of the panel, glazed with Poorboys Black Hole, sealed with Chemical Guys Blacklight and V7. Closer inspection reveals a few marks still left behind. I really am in two minds as to what to do here, I got the boot near on perfect using Menz polishes, but even with the most careful wash method and the plushest of microfibres, the paint still scratches, it is seems much softer even than my previous two Hondas. I'll have to decide whether to up the cut a bit more to get rid of the remaining scratches or accept that no matter what i do, i'm going to end with marring on it anyway!

Image

Image

Image


Finally a couple more shots. The rear panel looks a different colour to the door in the first picture, but it is only as a result of the light reflecting in a different manner where it is polished and being picked up different by the camera.

Image

Image


Just got to find time to work round the rest of the car now!
Image

User avatar
Shiny
Posts: 1972
Joined: Sun Aug 08, 2010 4:15 pm
My Generation: 0G
Location: Sunny Swindon
Has thanked: 2 times
Been thanked: 11 times

Re: Shiny's Accord Type R....

Post by Shiny » Sat Feb 18, 2012 8:02 pm

Aye up...


A Facelift lip!!!!!

Needs some refining and the painting but, to be fair, the fitment is very good indeed. This is just held in place -

Image

Image


The edge is a bit proud here, but bear in mind this has just been lifted on to the bumper. The way to attach it is to screw the edge that sits in the wheel well, so that will put it in the couple of mm by which it sticks out.

Image

Image

Image

Image


The edges will need tidying up before painting as they have a ridge on the them.

Image


Removed the apple juices and it stayed in place, so it is nice and snug.

Image

Image

Image

Image

Image

Image

Image

Image


Just need to decide now if i'm going to have a go at painting it myself or get a bodyshop to do it.
Image

User avatar
Shiny
Posts: 1972
Joined: Sun Aug 08, 2010 4:15 pm
My Generation: 0G
Location: Sunny Swindon
Has thanked: 2 times
Been thanked: 11 times

Re: Shiny's Accord Type R....

Post by Shiny » Sat Feb 18, 2012 8:03 pm

Just a bit more polishing today, this time a second hand GReddy oil catch can -

50/50 after Autosol with wire wool followed by Autosol in a polishing pad on the DA -

Image

Image

Image


The whole top done as above, finished off with Gtechniq P1 on a finishing pad and a bit off Clearkote YMG & CMW.

Image


Unscrewed the connectors so polish the rest up -

Image


Finished job, with a bit of PTFE tape on the threads -

Image

Image
Image

User avatar
Shiny
Posts: 1972
Joined: Sun Aug 08, 2010 4:15 pm
My Generation: 0G
Location: Sunny Swindon
Has thanked: 2 times
Been thanked: 11 times

Re: Shiny's Accord Type R....

Post by Shiny » Sat Feb 18, 2012 8:03 pm

Finally finished polishing today, did the nearside...

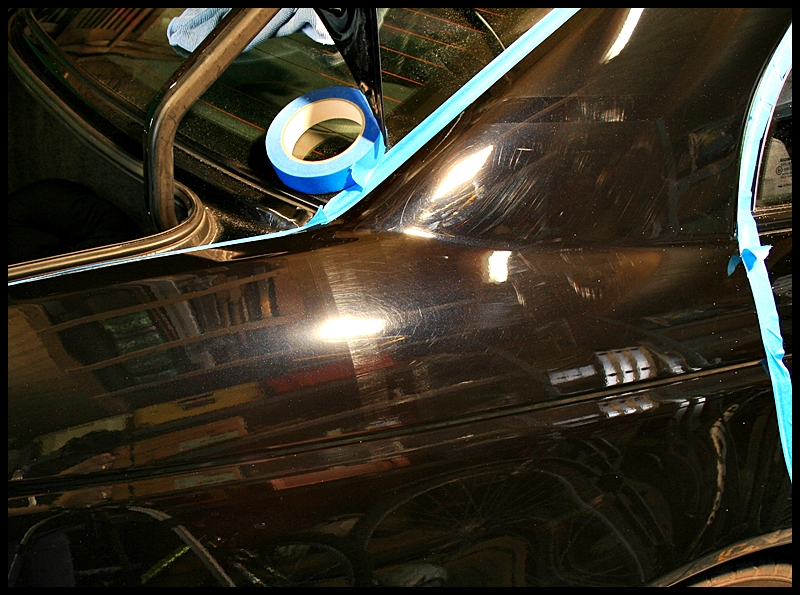
Washed down with ONR, dried with MF towel and taped up ready for new Tron movie...

Image


Only used my phone, couldn't be arsed to go back into the house and set up my camera, so was difficult to show the up close state of things...

Image


Polished with Gtechniq P1 on a Megs polish Pad and refined with P1 on a Finishing Pad -

Image


Was dark when i finished (afetr popping out half way through to pick up the kids from school and then again to pick up the missus from work!), but after a coat of Chemical Guys Blacklight and a wipe down with Chemical Guys V7 -

Image

Image
Image

User avatar
Shiny
Posts: 1972
Joined: Sun Aug 08, 2010 4:15 pm
My Generation: 0G
Location: Sunny Swindon
Has thanked: 2 times
Been thanked: 11 times

Re: Shiny's Accord Type R....

Post by Shiny » Sat Feb 18, 2012 8:03 pm

Image
Image

Post Reply

Return to “Non-Lude Profiles”